Showing posts with label Cooking. Show all posts

1/19/2009

UW-Platteville Carrot Cake Recreated...


My wife and I are both alumni of UW-Platteville. The university run food service there makes a carrot cake that is, to say the least decadent. My wife has dreams about this cake. Well, recently I was cleaning out one of the last boxes from moving and stumbled upon the recipe. You see, the food service was good about giving out the recipes and would even calculate out the amounts for making a "normal" batch. So, for my wife's birthday, I decided to try and recreate it with my own little tweeks.

The changes I made to the recipe have more to do with the method. In Alton Brown's book about baking "I'm Just Here for More Food", he makes the observation that carrot cake is not cake but a form of muffin. Thus, I applied Alton's "muffin method" to the recipe. I also added yellow rasins, because carrot cake needs some type of rasin. Because my wife loves the icing, I also split each layer so there would be four layers to allow for more icing delivery.

Mark's 4 layer UW-P Carrot Cake

Dry Works

2 2/3 cups all purpose flour
1 3/4 tsp baking soda
1 3/4 tsp baking powder
2 1/2 tsp cinnamon

Wet Works

1 1/4 cups canola oil
5 eggs
1 3/4 cups + 2 tbs granulated sugar

Additions

2 1/2 cups carrots (freshly grated)
1 cup crushed pineapple with juice
1/2 cup pecan nut pieces
1/2 cup yellow raisins

Before starting, preheat oven to 350 degrees F. Prepare two 9" round or 8" square cake pans by lining the bottom with parchment paper and coat with oil and flour (or Pam for Baking).

In a mixing bowl, combine the dry works. In a second, larger bowl, combine the wet works and whisk until well mixed. Add the carrots and crushed pineapple to the wet works and mix well with spatual. Add the pecans, yellow raisins and dry works and mix with spatual just enough to bring everything together. Divide the batter between the two pans and even out the tops with a spatual.

Place in oven and bake for approximatly 45 minutes. After 25 minutes, rotate the pans in the oven so the cake bakes evenly. Cake is done when toothpick comes out clean. Cool in pan for 20 minutes to allow the cake to set up. Using a thin knife, loosen the cake from the sides of the pans and then turn out onto cooling racks to prevent condensation from building up. Cover with a kitchen towel and let cool until cake comes to room temperature. Cover with cling wrap and refrigerate for at least 4 hours before icing.

Icing

16 oz cream cheese at room temperature
1 cup butter at room temperature
1 tsp vanilla
6 cup powdered sugar

In a stand mixer, beat together cream cheese, butter and vanilla. Once combined, set the speed of the mixer to low and begin adding powdered sugar 1/2 cup at a time. Scrape down the sides of the bowl as needed. Once the sugar has been added, scrape down the sides of the bowl one last time to ensure the icing is well mixed.

Remove cake layers from refrigerator and using a thin serrated knife, split each layer by cutting in from the edge and slowly rotating the cake. The effect is a bit like spiraling into the center of the layer from the side. A cake makers knife would be ideal for this process but one of the blades from a electric carving knife also works (and is not a unitasker). When you are done, use a cookie sheet to remove the top half of the cake layer. Do this by gently sliding the cookie sheet into the knife cut and pushing the top half onto the cookie sheet. Repeat the process with the other cake layer. When done, you should end up with 4 cake layers about about 1" thick.

Begin icing by placing one layer, cut side down onto a plate or aluminum foil covered piece of cardboard. Spread some of the icing on the layer. Place another layer of cake, again cut side down, on top of the first. Repeat with icing and then another layer and so on. Once the layers are stacked, ice the outside of the cake with the remaining frosting.

Cake serves approximately 20 people without causing diabetic shock. Leftover cake can be frozen by cutting into 2 serving pieces and wrapping them in wax paper, aluminum foil and then a freezer bag. May be stored for up to 3 months.

12/31/2008

Kitchen Gadget Recommendation

This past year, our rice cooker died. After researching options and brands for about 3 months (yeah I know but there was a decision matrix involved), Lou and I finally settled on a Sanyo ECJ-HC100S rice and slow cooker. Did seriously consider the Zojirushi cookers but they were all a little more expensive and didn't have the slow cooker feature.

Have to say, it is the coolest rice robot. Throw rice in it with the water, pick the rice type on the little control panel and let the fuzzy logic do its thing. It is a little slow. Take a good 45 minutes to do 5 cups of brown rice but it hasn't been a problem so far. Thou I haven't used it, it does have a delay cook option so you could set it up before going to work and it would be ready when you got back. The hold temp option works really well also. Since the cooker is kinda pressure sealed, keeps the rice nice and moist for hours after cooking.

Today, I finally got around to using it as a slow cooker. I made a double patch of Alton Brown's tapioca pudding in it. Worked great. Threw in the tapioca with the milk for 2 hrs on high. When done, it kept it warm until I came around and finished it off. In theory the rice robot also works as a vegetable steamer and will even make tofu if you are hard core.

So, if you are looking for a rice cooker that is also a multi-tasker, get this one. It does come in 5 1/2 cup model as well but the 10 cup does just fine making 2-3 cups of rice, so I would recommend the bigger one unless you are looking for something for that small apartment in Tokyo.

11/24/2008

Baking this weekend

Tis the season for fruitcake. This weekend I made several of them using the blond fruitcake recipe I have. They need to "age" in the fridge for a couple of weeks but should be ready just in time for the holidays.


11/12/2008

This Weekends Bread


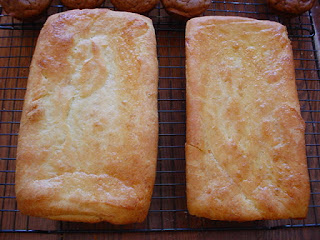
This weekend I did a large bake. I attempted the light honey wheat and the Italian White breads that I had made previously. They turned out OK but I didn't get the rise out of them that I would like. Will need to practice those some more.

I also experimented with what I am going to call "pumpernickel in quotes". The reason I call it that is a true pumpernickel is usually 100 percent rye, take 5 to 30 hours to bake and has a whole bunch of ingredients. I just don't have time for all that. So, what I did was take the transitional rye recipe that I have been successful with and tweeked it with some cocoa powder and coffee to make a reasonable substitute. The recipe is below and takes some prep work the night before you want to bake the bread.

"Pumpernickel in Quotes"

Makes 2 - 1lb loaves

Soaker

8 oz coarse rye flour
4 oz white rye flour
4 oz whole wheat flour
1 oz cocoa powder (dark is best)
1 tsp salt
13 1/2 oz plain yogurt

Mix all the soaker ingredients together in a bowl until the flour is hydrated and the ingredients come together into a ball. Cover and let stand at room temperature overnight.

Biga

16 oz white bread flour
1/2 tsp instant yeast
10 oz black coffee at room temperature (can also use espresso and water)

Mix the biga ingredients together until they form a ball of dough. With wet hands, knead the dough for about 2 or 3 minutes. The dough should be very tacky. Let rest for 5 minutes. Prepare a large plastic storage container with some spray oil. Knead the dough with wet hands for another minute. Place dough in plastic container and let stand at room temperature for 2 hr until it doubles in size. Degas the dough after 2 hrs and place back in plastic container and refrigerate over night. It will continue to rise overnight and will approximately triple in size.

Before making the final dough, remove the biga from the refrigerator 2 hours in advance to allow it to come to room temperature.

Final Dough

All of the soaker
All of the biga
2 oz coarse rye flour
1 1/4 tsp salt
0.5 oz instant yeast
2 oz molasses
1 oz buckwheat honey
1 oz olive oil
Extra white rye flour for adjustments

Using a pastry scraper, cut the soaker and biga each into about 30 small pieces. Dust the biga with the coarse rye flour to keep the pieces from sticking together. Place pre-doughs in a large bowl with rest of the ingredients. Mix with spoon or wet hands until the dough roughly comes together and then turn out on a well floured counter or cutting board.

Begin to knead the dough. Depending on the amount of mixing in the bowl, knead for 4 to 6 minutes until the dough is uniform. Try to only add as little flour as needed to keep the dough from sticking. Do not over knead or the rye flour will become gummy. Let the dough rest for 5 minutes while you prepare a clean bowl with spray oil.

After resting, knead for another minute, form into ball and place in the prepared bowl. Cover with plastic wrap and let rise for 45 - 60 minutes or until it gets to 1 1/2 times its original size.

After the first rise, turn the dough out on a board dusted with rye flour and divide in 2. Form each into a loaf and place in oiled 4" by 8 1/2" bread pan. Mist the top with spray oil and cover loosely with plastic wrap. Let rise a second time for another 45 to 60 minutes until about 1 1/2 times original size.

When ready to bake, pre-heat the oven to 425. While the over pre-heats, remove the plastic wrap and slit the top of each loaf with a clean razor blade. When oven is ready, place the pans in the oven and reduce the temperature to 350. Bake for 20 minutes and then rotate the pans. Continue baking for another 20 to 30 minutes until the internal temperature reaches 195 degrees and the top sounds hollow when tapped.

When done baking, remove from pans immediately and set on cooling rack. Cover with dish towel and let cool for at least 1 hour before slicing. The cooling is an important step because the bread needs time for the internal structure to setup before you slice it.

10/13/2008

Bohemian cultural weekend

My distant relatives hail from the Prague area of what is now the Czech Republic. This past weekend, my wife Lou and I visited my parents and ended up having a very Bohemian weekend. In the morning, we took a baking class to learn how to make the traditional kolache pastry. The picture below is of me doing the initial forming.


And my wife with a tray of the results...


And after about 3 hours, the results are pictured below. We also made some traditional dinner rolls with the same dough.


My parents make sauerkraut most years. This year, they turned 150 pounds of cabbage into about 100 pounds of kraut. The deal I have with my brother is he does the input (i.e. the slicing) and I do the output which ends up being the packing. So, after about 2 hours Saturday evening, we ended up with about 75 packages of kraut in the freezer.


Before we left the next day, Lou decided Daisy needed to pose with the pumpkins.

9/16/2008

Meatloaf

Thought I would share my recipe for meatloaf.

1 1/4 lb ground chuck (80%)
1 cup quick oat meal (approx)
1 cup cracker crumbs (approx)
1/2 cup onion (fine dice)
1/2 cup celery (fine dice)
1/2 cup bell pepper (fine dice)
3 tbs ketchup
3 tbs yellow mustard
1/2 tsp kosher salt
1/2 tsp ground black pepper
1/2 tsp ground cumin
1 egg
3 tbs soy sauce
1/2 bottle of beer

In a large bowl, add ground chuck and approximatly a combined equal volume of the oat meal and cracker crumbs. Add aromatics, ketchup, mustard, spices and egg. Using hands, combine well adding oat meal if needed to adjust the texture. Once combined, move mixture to a large baking dish that has a cover. Form into a well packed ring or loaf depending on desired use. Pour soy sauce over the top and cover.

Bake in a preheated 350 degree oven. After about 20 minutes when the meat is taking on a little color, pour 1/2 of a bottle of beer into the bottom of the baking dish. Drink the rest of the beer. Continue baking for another 30 minutes or so until the interior registers about 170 degrees. Let rest for a few minutes and then server. Leftovers can be refrigerated and used for meatloaf sandwiches on rye bread.

Alternative - Use 2 tbs of barbecue sauce in place for 1 tbs of ketchup and 1 tbs of mustard and add 1/2 tsp of Lawry's seasoning salt.

9/10/2008

Look at this...

Under the philosophy that everything is better with Bacon... Bacon Salt! Don't know how it could be kosher but...

8/23/2008

This weekends bread


Well, after almost a month, I made bread this weekend. A batch of oat bran flax and some challah.

7/27/2008

Quinoa Cabbage Rolls

Ingredients

1 medium head of Savoy cabbage (8-10 outer leaves + 1 cup of course chopped)

1 cup onion (course dice)
1 cup celery (course dice)
1 cup sweet bell pepper (course dice)
1/2 of a jalapeño chili (no seeds)
2 tbs fresh parsley
1 tbs olive oil

1 1/2 cup cooked quinoa

1 can garbanzo beans
juice of one lime

1 can of diced tomatoes
salt and pepper to taste

Bring a large pot of water to a boil. While waiting for the water to boil, carefully cut apart the cabbage to get 8-10 large outer leaves and set those aside. Chop up about 1 cup of the remaining cabbage for use in the filling. Also prepare the quinoa as directed on the packaging.

When the water reaches a boil, blanch the cabbage leaves for a few minutes just until they start to get tender but don't over cook them. You want them just done enough to be able to form the roll. You only want to do a few at a time so they don't get overdone. When all the leaves are blanched, set them aside to cool for a bit while you prepare the filling.

Saute the onions, celery, bell pepper, chili, chopped cabbage in a heavy pot will a little olive oil. While the vegetables cook, coarsely puree the garbanzos with the lime juice in the food processor. Should be kinda like the texture of chunky peanut butter. When the vegetables are fork tender, take them off the heat. Add the parsley, quinoa and garbanzo mixture to the vegetables and mix. Adjust seasoning with salt and pepper as desired.

Form the rolls by taking a cabbage leaf and laying it flat on a work surface. Take a large spoon full of the filling (about 1/2 cup) and place it on the rib of the leaf. Fold the end of the leaf over toward the rib and then roll up the two sides. Place the roll seam side down in a oven safe baking dish. Repeat until you run out of leaves, filling or room in the baking dish. You should get about 8 to 10 rolls.

Spread the diced tomatoes over the top of the rolls and bake covered in an 350 degree oven for about 20 minutes so the rolls warm up and steam a little.

Quinoa is Cool

My wife and I are "foodies". A few months ago we were watching a food show where the grain quinoa (pronounced keen-wa) was used. It is native to South America and has recently been growing in popularity because it is high in protein and other stuff that is good for you. As such, we have been using it in place of things like rice or pasta in meals. Last week, I had a spurt of inspiration and came up with a couple of dinners where quinoa played a central part. Since they turned out pretty well, I thought I would document them. The first is kinda a play on a classic cabbage roll and the other was a Mediterranean inspired pita. I will make each its own post so things are easier to keep track of.

This weekends bread


I had this Friday off so I baked bread. One of the offerings was the old standard of a transitional multi-grain. The other was an experiment. This is the first bread from a recipe that is not Peter's. I decided to make a honey-wheat sandwich bread from the "Baking at Home" book put out by the Culinary Institute of America. I like the layout and style of this book but I don't like the bread recipes. They do all the measurements by volume which just doesn't work for bread. I ended up converting the measurements to weights but ended up using a fair amount extra flour. The bread turned out well. It had a nice texture and the flavor was there but I think I can make it better. The next time, I am going to try making it using some of the techniques from the Pain de Campagne recipe from Peter's book. Stay tuned.

7/25/2008

Cranberry Pumpkin Muffins

This recipe is based on a recipe for Pumpkin Muffins from the Food Network with a few twists.

Dry Works

1 cup all-purpose flour
1 cup fine white rye flour
1 tsp baking soda
1/2 tsp salt
1 tsp ground cinnamon
1/2 tsp ground ginger
1/4 tsp ground cloves
1/4 tsp ground nutmeg

Wet Works

3/4 cup packed dark brown sugar
3 tbsp unsulphered molasses
1/4 cup canola oil
2 large eggs
1 cup canned pumpkin
1 tsp vanilla extract
3/4 cup buttermilk

Additions

1 cup dry cranberries

In a medium bowl, mix all of the dry works. In another bowl, combine the wet works until well mixed. Add the dry works and cranberries to the wet works and mix just enough to bring the batter together. Using a #30 disher, portion out the batter into small muffins pans coated with spray oil. Bake in a pre-heated 400 degree oven for approximately 20 minutes or until a toothpick comes out of the center clean. Makes 18 small muffins.

7/13/2008

This weekends bread

This weekend, I did a fair amount of bread making. Two loaves of oat bran-flax bread and two loaves of multi-grain transitional were the whole-grain offerings. The multi-grain was made with rye flour, oat flour, rolled oats, wheat bran and 10-grain cereal.

Then I made two loaves of challah. As an experiment, I attempted a chocolate challah with one of them by tweaking Peter Reinhart's recipe from his Bread Baker's Apprentice book. The inspiration came from my marble rye attempts. The recipe is as follows:


Chocolate Challah

Bread

27 oz unbleached bread flour
1.5 oz sugar
1.5 oz cocoa powder
1.5 tsp salt
2 tsp instant yeast
2 oz olive oil
3 large eggs
3 large egg yokes
12 oz water at room temp

Egg Wash

1oz water
3 large egg whites

Combine the flour, sugar, cocoa powder, salt and yeast in a mixing bowl. Crack the eggs and egg yokes into another bowl (reserving the egg whites for the egg wash). Whip the eggs and yokes with a fork to break things up. Add 6.8 oz of the egg mixture (use the rest for the egg wash), 12 oz of water and
the olive oil to the mixing bowl and stir until things come together and form a rough ball of dough.

Transfer the dough to a floured counter and knead for 10 minutes. Adjust flour as needed so the dough remains soft and slightly tacky but not sticky. After kneading, form into a tight ball and transfer to a lightly oiled bowl. Cover with cling wrap and ferment for 1hr. After 1hr, knead the dough again for 1 minute to degas. Reform a tight ball and return to bowl. Cover and ferment for another hour or until dough raises by 1 1/2 times.

After the second ferment, remove the dough and divide into 8 pieces. This will be used to form 2 4-braid loaves. Take each piece of dough, flaten it slightly and then roll up to form the start of one of the braids. Should be about 2 inch thick and about 6 inches long. Do this for all 8. Now take each one of them and roll out to about 1/2 thick and 15 inches long. If they keep springing back, let the dough rest for about 5 minutes and try again. Then, use the braiding technique from Peter's book, form into 2 4-braid loaves. Place each loaf into an oversized (10" by 4 1/2") lightly oiled bread pan and brush with egg wash made from the egg whites and about 1 oz of water. Let proof for about 1 1/2 hours until the loaves fill the pan but don't rise above the pan edge much.

After proofing, preheat oven to 350. Brush the loaves with egg wash again. Bake for 20 mintues and then rotate 180 degrees and bake until internal temp gets to be 190 degrees (about another 20 minutes). The loaves will have a fair amount of oven spring so make sure the oven rack is in the center. Cool for 1 hour before slicing.

7/02/2008

This Weekends Bread

This weekend was rather busy because I had to work on a software upgrade. However, I still managed to get my bread making fix on Sunday. I made Oat Bran - Flax bread again and also Pain de Campagne from Peter's book. The Pain de Campagne is kinda like a French bread but with about 15% whole wheat or rye flour. I made it with rye. Normally it should be used for making fancy shaped loaves but I just formed it into slightly oversized baguettes. It had a fair taste but because I was a little rushed, I baked it at to low of temperature so the crust got very tough.

6/22/2008

This Weekends Bread

This weekend, I made challah and whole wheat multi-grain bread. Instead of doing a traditional braided loaf for the challah, I braided it and then put it in a loaf pan to rise and bake. Unfortunately I miscalculated the "spring" during baking and the loaves got a little huge. I had originally thought that I wouldn't have enough dough so increased the recipe by 50% but I probably would have been fine. Still came out very well and makes killer PBJ's.

6/15/2008

This weekends bread

The breads this weekend where a cranberry-pecan cinnamon bread, an oatmeal-flax whole wheat bread and my first attempt at brioche. I have made the cinnamon and the oatmeal-flax breads before but the brioche was something new. It is a very different technique and I will have to try it again because I think I let it over rise. It tastes good though. Kinda like a big slice of croissant.


6/09/2008

Woodworking project for my wife...

Lately, Lou (my wife) has gotten the bug to make pasta from scratch. Dare I say she is getting good at it. Besides, she puts up with my bread obsession so what comes around goes around. She asked me to make her a pasta drying rack. The only hobby I enjoy more than bread making is wood working. I find the process of turning large pieces of wood into smaller ones very relaxing.

6/08/2008

This weekends bread

This weekend, I made another version of marble rye and French bread baguettes. This version of marble rye was inspired by Reinhart's delayed ferment rye recipe from his whole grain book. I made a double batch and then split it into a light rye made with corn syrup instead of molasses an a dark rye made with some cocoa powder (0.8 oz) and a little extra water (1.6 oz). I ended up adding to much water so the next time I do this, I will do the cocoa to water in a 1:1 ratio. The other change I made was to put the loaves in bread pans after braiding. I did this to form more of a sandwich loaf which worked out pretty well.


The French bread is from Peter Reinhart's other book, The Bread Bakers Apprentice: Mastering the Art of Extraordinary Bread. The baguettes could have baked a little longer to develop a crispier crust but otherwise it turned out pretty well.


To make the baguettes, ideally you should bake them on a large pizza stone to create that hearth baked effect. I have been looking at different pizza stones for a few weeks but all the ones I found were either really small or really expensive. However, a re-read of an earlier chapter in Peter's book suggested using unglazed quarry tile. This suggestion was confirmed by Alton Brown's Gear for Your Kitchen. So, $4.00 later and about 2 hours with a tile saw resulted in a set of tiles that fit into a half-sheet pan. Actually, I made two sets for the $4.00 so it works out to be about 20 times cheaper in material costs than buying one of them fancy stones.

5/31/2008

This weekends bread

Saturdays have turned into my bread making day. When we are around and don't have anywhere to be by noon, I make bread. This week, it was a "transitional" multi-grain and also a high fiber bread with oat bran and flax. Both are again from Peter Reinhart's excellent book on whole grain bread.

This book has turned me into a bit of a "bread nerd". I have invested in a bunch of loaf pans (more than we really needed) and several large mixing bowls. There is now about 5 different types of bread flour in our pantry and last weekend I spent the better part of 20 minutes considering the properties of a mixing spoon at William Sonoma. I even went to the point of ordering 1000 plastic bags from ULine and 2000 twist ties.

So far, my hobby has mostly eliminated the need for store bought bread around the house. I don't think it saves any money, especially when King Arther bread flour at almost $6.00 a bag. However, as a hobby, it provides the right combination of art and science to keep me out of trouble.

Asian Style Slaw

The other night, with the goal of coming up with something that didn't have many Weight Watchers points, I put this together. Lou liked it and given that she isn't a big fan of slaw in any form, I decided that was enough to make it a keeper. The next time I make it though I want to try rice wine vinegar instead of the apple cider.

Slaw

4 cups green cabbage (shredded)
1 cup carrot (grated)
1 1/2 cup grated Japanese radish (diakon) (grated)
1/2 cup white onion (finely sliced)

Dressing

1/4 cup apple cider vinegar
1/4 cup brown sugar
1 tbs brown mustard
1 tbs peanut butter
1 tbs lime juice
1 tsp garlic chili sauce (Sriracha)
1/2 tsp ground ginger
salt and pepper to taste

Combine the slaw ingredients in a large bowl. Combine the dressing ingredients in a small bowl and whisk together until they emulsify. Pour dressing over slaw and combine to coat. Let stand in the refrigerator for about 30 minutes before serving. Makes about 8 servings and for those counting WW points, each serving is 1 point.