5/23/2012

Bread Porn - Spring 2012

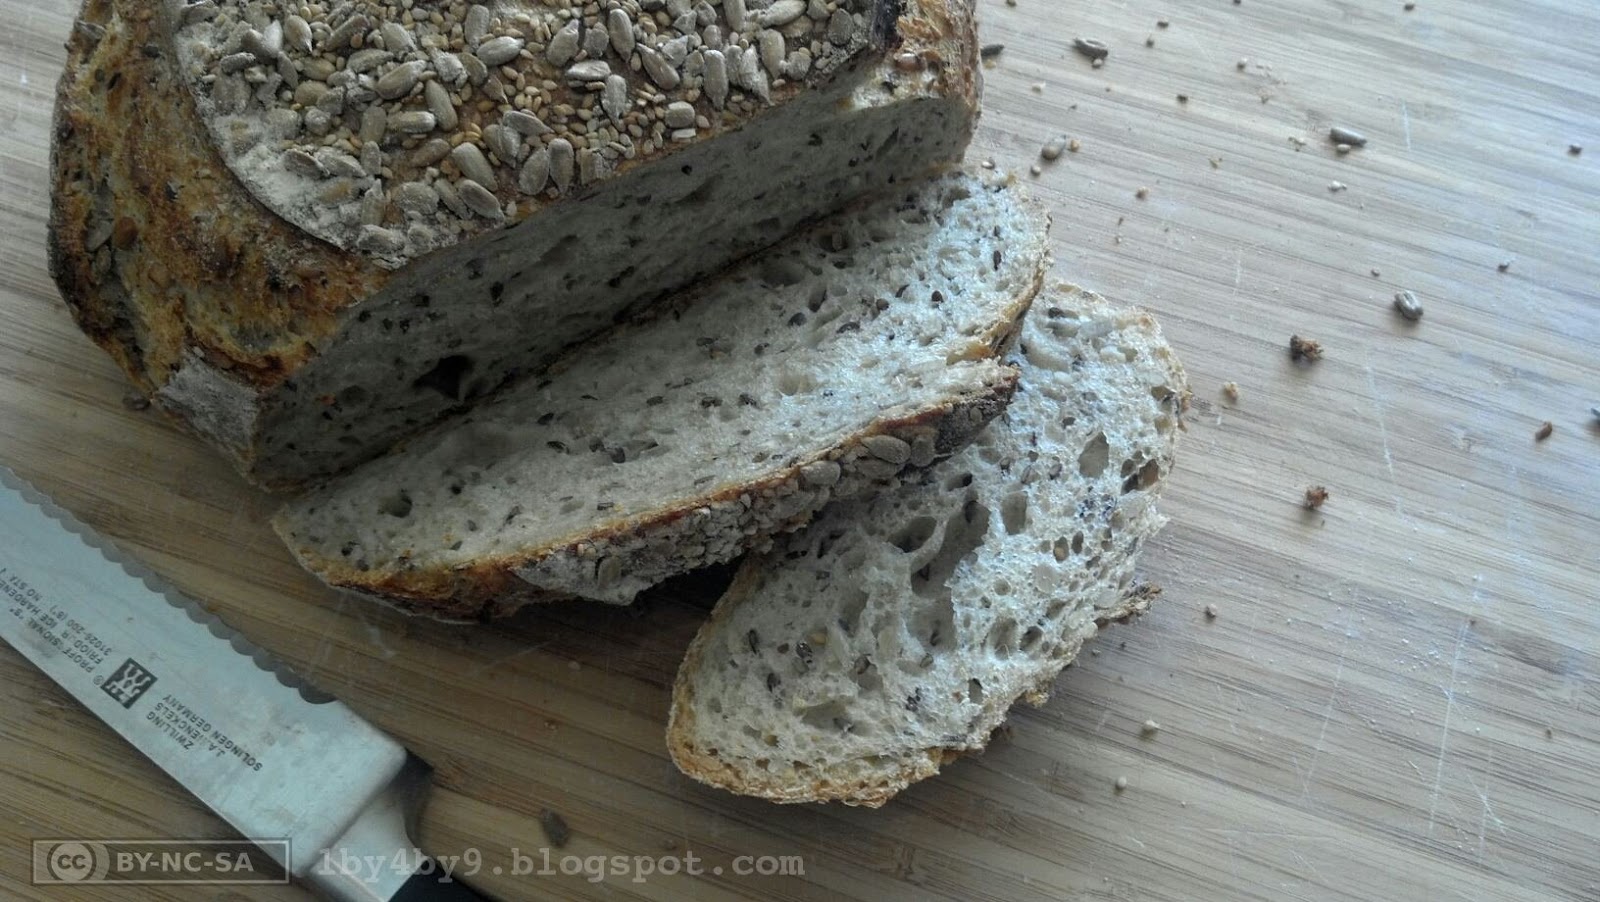
The last couple of months, career things have left little motivation to write about bread. For sanity reasons, I still found time to bake it however.  I also upgraded my camera to improve the quality of the resulting bread porn.  

Things have settled down a bit and wanted to take a moment a post some of the loaves that turned out especially well.  Enjoy!

The new camera allows for nice close-ups.  A whole-wheat / whole-rye sourdough from January.
Seven-Grain Sourdough and Baguettes from January.

I had a nice success with a 70% rye in February.
Some Challah in February.
Cranberry-Fenney Rye from February.
Two-Castle Rye from March

Some caraway rye from April.
A stiff levain based sourdough from April.


12/18/2011

Bread Porn - Nov 2011

Some pictures from last months baking.


One of the things I am working on is a post comparing different brands of flour.  The picture above is part of the research and is a baguette with a poolish pre-ferment made from Pillsbury Best Unbleached All Purpose Flour.  I still have a couple of more brands to test but look for a post after the new year.


Some chocolate bread using a recipe from my SFBI workshop and Two-Castle Rye from Advanced Bread and Pastry modified using a hand mix procedure.


Lastly, some late season raspberry-cranberry jam.  

11/24/2011

Bread Porn - Aug/Sep/Oct 2011


It's been a while since my last post.  Collecting materials for a couple of articles, but here is some bread porn from the last couple of months.


Some challah with some yellow raisins baked into the strands and a variation of pan bread with some whole wheat flour.


Some Two-Castle Rye from Advanced Bread and Pastry.


Some spelt-rye miche.  The two on the left were baked using the iron dutch-oven method from Tartine Bread and the larger one on the right was baked on a stone with steam. 


Some Cranberry-Fennel Rye, a variation of the same using figs and anise seeds, and some baguettes using flour from Central Milling.


Some hand mixed 3-Seed sourdough.


Some baguettes and a Prune-Orange Rye


Some walnut rye from Bread.

7/10/2011

Book Review - Bread


Bread: A Baker’s Book of Techniques and Recipes by Jeffrey Hamelman, Wiley, 2004

If there was an American qualified to pull off a book simply titled “Bread”, Jeffrey Hamelman would be on the short list.  He is the director of the Bakery and Baking Education Center for King Arthur Flours and was at one time captain of the Baking Team USA that competed in the “Bread Olympics” in Paris which took first place in 1999.  Suffice to say, he knows a thing or two about the art of baking and his command of the topic comes through in his book Bread.

Like Peter Reinhart's BBA, Jeffery Hamelman spends the first quarter of Bread talking about the theory and method of baking bread.  In contrast with BBA, the discussion is clearly targeted for a baking technician, but is still very approachable for a home baker with some experience.  I especially enjoy his presentation on flour and the different grains used to make bread.

Of the cookbooks I have read, Bread presents an exceptional array of formula covering the entire spectrum of bread with especially strong sourdough and rye offerings.  Each formula presents both a “home” and commercial version.  The process associated with each formula is clearly presented and I have yet to find a flaw with any I have attempted.

In addition to general overview at the beginning of Bread, Jeffery also presents dedicated sections to the unique techniques needed to bake sourdough and high percentage rye breads.  Later in the book there is an excellent section on forming braided breads which I constantly refer back to.  This is also one of the rare books that has a section on making decorative breads.  While I have not tried it, making a basket out of bread would be an interesting project.

Bread is the book I used when I started working with sourdough.  His “Five-Grain Levain” and “Sourdough Seed Bread” are regulars on my weekly bakes.  His “Sourdough Rye with Walnuts” is also excellent and a good place to try out the techniques specific to rye breads.  After two years, I still routinely turn to Jeffery’s masterpiece.  My only grumble with Bread is the lack of pictures.  There are color pictures at places that show the final result for the critical breads but I do feel it detracts a bit from an otherwise exceptional book.

While not the best book for a person first starting out, it is the book you will want when casual baking turns into a weekly routine.  If I was being sent to a prison colony on a far away island, this is the book I would try and sneak along.

7/02/2011

Bread Porn - June 2011

Summer is the time when I dial back the baking.  When it is 90 out, you don't want to heat up an oven.  All the same, a couple of successful bakes did happen.


Some challah and a simple multi-grain recipe that I am working on for a future blog post.


Some cinnamon raisin-walnut bread.

6/18/2011

French County Bread in a Fancy Shape

I like a crusty loaf of creamy white bread as much if not more than most people.  However there are those, usually with letters after their name, that say we should eat more whole grains.  “I make joke!”  I am a big proponent of the use of whole grains and especially rye in breads.  Aside from the health benefits, whole grains add a depth of flavor that is not possible with a highly refined flour.  

There are many recipes for “Country French” or Pain de Campagne.  This is my version and builds on the basic French bread of a previous post by substituting whole wheat and whole rye flour for some of the white flour.  It is usually pretty easy to take any recipe that has all white flour and add up to 15% by weight of whole grains without much change.  You will usually only need to increase the amount of water to compensate for the higher absorption characteristics of the whole grain flour.  One other quick note about using whole grain flour.  Make sure you are using fresh whole grain flour.  The natural oils it contains will go rancid after a couple of months.  Unless you are going to use the flour in 3 months or so, you should freeze it.  

A country bread dough like this can be used much like a basic white bread dough and formed into a free standing bâtard or other standard shape.  However, there is a tradition in France where breads are formed into different regional shapes which can be very decorative for a table setting or dinner party.  This past holiday season, I was asked to bring bread to dinner and I made several couronne Bordelaise which translates into “Bordeaux crown”.  I used the excellent blog post at the Wild Yeast site as a starting point for the shaping procedure I present below.      

Preparing the Dough

The procedure to prepare the dough is the same as my procedure for making a basic French bread.  Follow the same instructions for making the preferment, mixing and fermentation using the following recipe. 

Poolish Preferment
4.90 oz Unbleached Bread Flour (Gold Medal Better For Bread) *
1.65 oz Whole Wheat Flour **
6.50 oz Water (room temperature)
Pinch (scant 1/16 tsp) Instant Yeast

Final Dough
4.45 oz Unbleached Bread Flour (Gold Medal Better For Bread) *
9.10 oz Unbleached All Purpose Flour (Gold Medal Unbleached All Purpose) *
1.65 oz Whole or Dark Rye Flour **
9.35 oz Water (room temperature)
⅜ Tsp Instant Yeast
0.45 oz Non-Iodized Salt
All of the Poolish Preferment

Additional Ingredients
Extra flour for dusting
Spray oil
1 cup ice cubes


* As with the basic French bread, If you use King Arthur flours, use the All Purpose type for all the flour in the recipe.
** Any whole wheat and dark rye would do but I use Hodgson Mill stone ground whole wheat graham style flour and stone ground rye which is a pumpernickel style for added texture in this recipe.  

This recipe will make enough dough for 2 free standing bâtards or 1 couronne Bordelaise.  If you want bâtards, follow the rest of the basic French bread procedure with the only modification of bake for a total of 45 to 50 minutes.  Due to the higher hydration, you need to bake a little longer.  If you are up for a little extra work, my procedure for making a couronne Bordelaise follows.  

Forming a Couronne Bordelaise

Before embarking on a couronne Bordelaise, some thought has to be given to how you are going to proof it.  As Susan of Wild Yeast points out, you could blow a bunch of cash and get a purpose made proofing banneton.  I don’t have one but I have used her other method of improvising one using a dish towel draped over a shallow bowl with a small upturned bowl in the center.  It works well but I only have one suitable shallow bowl.  However, I stumbled upon a third option while wandering around the housewares section of a local hardware store.  The store carried an inexpensive plastic party dish for holding chips with an small bowl in the center for holding dip.


Assuming you can find a similar dish, you will want to take a small dish towel or maybe even some newspaper to fill in the inner dish.  If you cannot find a similar party dish, I suggest you use the two bowl method from the Wild Yeast post.  In either case, drape a clean lint free dish towel over the whole thing and try and make it as smooth as possible in the depression.

NOTE - At this point, preheat your oven with a baking stone as if you were making regular French bread.


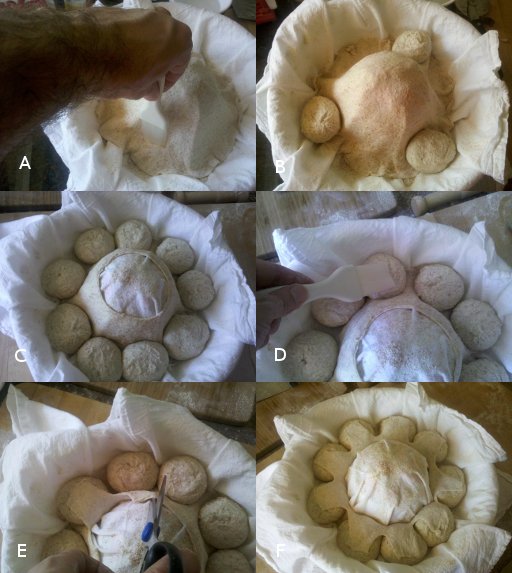
Using a small hand sieve, lightly dust the inside with some white flour to prevent the dough from sticking.  I like to also sprinkle some coarse graham flour on top of the white flour to give the eventual surface of the bread some texture but this is optional.

When the dough is ready to divide, weigh out one piece at 6 oz and the rest should divide up into nine 3.5 oz pieces.  Form into rough balls, cover with cling wrap, and let rest for 15 minutes. 


After the dough has rested, start by taking the 6 oz piece of dough and placing it on a floured surface.  Degas and start to shape into a flat disk which will form the “collar” to hold the crown together.  Using a rolling pin, flatten to a disk about 11” in diameter.  You can be generous with the flour to prevent sticking.  As before, I use some graham flour at this point to give the collar some exterior texture but this is optional.    


After you have rolled out the disk, dust with flour and using the end of the rolling pin or another blunt object, feather the edge all around the disk.  Later when the bread bakes, this will crisp up to give the distinctive lip all the way around.  When done, carefully roll onto the rolling pin to transfer to the proofing form.  Unroll and adjust the disk so it is centered in the form and extends well into the depression bottom evenly around.  


NOTE - Take care to keep the edge of the collar dry.  If it gets wet, it will stick and not form a lip during baking.    

At this point, take a pastry brush with a little water and wet the inner “hill” of the collar.  This will help to bond the rest of the crown to the collar.  Degas and form the 3.5oz pieces of dough into tight balls and place evenly around the collar to form the crown.  To help with spacing, I start out by evenly spacing 3 of the pieces and then filling in the rest.  For this crown, the inside of the collar ends up being a little to large so I take a kitchen shears and remove a circle of dough from the top of the "hill".  This will make it easier when you form the tabs.  With the pastry brush, dab the top of each ball of dough with a little water.  Using the kitchen shears again, cut evenly spaced tabs from the collar and fold each over onto the crown.  Cover with cling wrap and proof for 30 to 45 minutes.  


As with my French bread recipe, the bread will be proofed when it passes the dimple test.  When ready, place a piece of parchment paper on top of the proofing basket and then place a baking sheet on top of that.  Invert the stack to transfer the bread to the baking sheet.  Carefully remove the dish towel and dust off any excess flour with a dry pastry brush.  Place in preheated oven on baking stone, add pan of ice for steam and bake for a total of 45 minutes, rotating the bread half way through.  


Once out of the oven, let cool for about 1 hour before serving.  The bread should have a nice crust with a chewy texture to the crumb.  The result pictured above shows what happens if the collar gets a bit wet at the edge.  It won’t separate as it bakes, leading to an uneven lip.  However that is part of baking bread.  You share the results with friends and try again.  

6/11/2011

Book Review - Peter Reinhart’s Whole Grain Breads


Peter Reinhart’s Whole Grain Breads: New Techniques, Extraordinary Flavor by Peter Reinhart, Ten Speed Press, 2007

Whole Grain Breads is another of Peter’s offerings and a bit overshadowed in my opinion by The Bread Baker's Apprentice (BBA).  Given the healthy benefits of eating more whole grains, this book allows a person to bake tasty and healthy breads with minimal fuss.  He has an interesting presentation on bread at a TED affiliated event shortly after the book came out that is worth a look and gives a sense of his goals for the book.

The book has a nice narrative that outlines his motivation of the book and then a presentation that is similar in structure to the one in BBA for the process of making bread.  One should not feel cheated however because the discussion on whole grain ingredients, the processes needed to make grain soakers, and the different preferments are unique to Whole Grain Breads and well worth it.  There is a nice selection of formulas with some attempting to take traditional white breads such as challah or brioche and execute them using whole grain ingredients.  As with BBA, the formulas are well presented, accurate and well tested.  I actually like the format used to present the formulas in Whole Grain Breads better than BBA but that is purely a personal preference.  

I still come back to Whole Grain Breads on occasion and routinely bake breads either directly from the formulas or after a bit of artistic license.   I even used Peter’s Transitional Rye formula to reverse engineer my great-grandmother's Bohemian style rye that I remember for my childhood.  The original recipe that was handed down to me was the typical “use 3 to 5 cups of flour from the local co-op and add water until not to firm...”  Using the techniques from Whole Grain Breads as a Rosetta Stone, I was able to come up with a bread that has the favor profile I remember and has received “This is just like great-grandma’s” from my family.  If you want to bake whole grain breads at home, this book is well worth the investment.