2/05/2009

Dough for Bohemian rolls - Updated...


Part of my heritage is Bohemian rolls and kolaches, which are small fruit topped torte type devices. Both of my grandmothers as well as my aunts made them. However, their recipe to make them, as well as the mystical technique to make them has been somewhat lost. In the fall of 2008, my wife and I, along with my brother, his wife and my mother attended a class to make kolaches as this type of bakery is very prevalent in the northeastern Wisconsin where I grew up. As part of the class, we were given a recipe for the dough. However, as with most recipes, I found the instructions difficult to reproduce reliability. After a few trial runs, I have recreated a version of the recipe that was presented. The dough can be used to make Kaiser rolls, dinner rolls or kolaches depending on what technique is used for shaping. So, here it goes...

Dough for Bohemian Rolls in the Style of Northeastern Wisconsin

Makes 1 dozen Kaiser rolls, 2 dozen dinner rolls or 3 dozen kolaches

17.6 oz unbleached white bread flour
0.65 oz wheat gluten
1 1/2 tsp salt
1.75 oz granular sugar
0.80 oz instant yeast
1/2 cup + 1 tbs 2% milk (warmed to body temperature)
1/2 cup water (warmed to body temperature)
1/3 cup butter (softened)
4 large egg yokes
melted butter to coat rolls after baking

In the bowl of a stand mixer, combine the flour, wheat gluten and salt. Mix thoroughly and then create a depression or "well" in the center. In a microwave safe measuring cup, warm the milk and water to about body temperature (95 to 100 degrees Fahrenheit). When warmed, pour into the well and sprinkle the sugar and yeast into the well. Stir the sugar and yeast into the liquid (but don't bring in the flour yet) and let stand for about 5 minutes. While the sponge is doing its thing, soften the butter in the microwave (reuse the measuring cup if you like) and separate the eggs for the 4 yokes. You may discard the whites or use for something else.

Once the sponge is frothy and has a strong yeast smell, add in the butter by pinching it up into little chunks. Also add in the egg yokes at this time. Using a bread spoon, roughly bring the dough together in the bowl. Using a dough hook in the stand mixer, knead the dough for a good 5 to 8 minutes at low speed, stoping to scrape the dough from the hook every so often. The dough should be very sticky and ragged but will be ready when it separates from the sides of the bowl and has good elasticity. While the dough is kneading, prepare a large clean bowl for rising by coating with spray oil. Once the dough is mixed, turn out into the oiled bowl and cover with plastic cling wrap. Let rise in a warm place for about 1 hour until it is more than double in size. After the rise, form depending on style of bakery as directed below.

For Kaiser or dinner rolls

Before starting, prepare two or three 1/2 sheet pans with parchment paper. Turn out the dough on a heavily floured surface,and divide into 12 or 24 equal pieces using a dough scraper; depending on type and size of roll. Pre-shape each piece into a small ball by first stretching and then pinching the dough to form a tight skin. The technique is the same as forming a small boule. As you shape each ball, stage on the parchment covered sheet pans.

Once you have all of the pieces pre-shaped, go back and start forming them into ropes. Do this by rolling between your hands in a vertical orientation, letting the dough hang down. Try not to add flour to the dough but you may need to dust your hands to prevent sticking. Once the rope is about 1/2" to 5/8" thick, you can form into the roll shapes by any number of methods.

Below is a sketch done by my brother of the basic method to make a traditional "knot" roll in figure C. Figure D takes it one step further and makes a "bird" roll by making a beak and flattening the tail. Use a dough scraper to cut the "feathers".


The next is a sequence of pictures illustrating how to make a "double knot".


Kaiser rolls are a modification to the knot. You start by making a knot but leave more room in the center "eye". Then take the tail and continue threading it though the eye; working your way around. I will try and update the blog with a photo sequence at some point. The Kaiser roll is also demonstrated in Peter Reinhart's "The Bread Bakers Apprentice" as a "knotted roll" on page 82.

Once formed, place the rolls back on the sheet pans with enough separation to allow for proofing and a fair amount of "oven spring" when baking. Spray lightly with spray oil and cover loosely with plastic wrap. Proof in a warm place for about 45 minutes until the rolls expand about 1 1/2 times.

Preheat oven to 425 degrees Fahrenheit. Once preheated, bake rolls for 7 minutes and then rotate 180 degrees and bake another 7 minutes. If you are making more than 2 pans, you may want to start by placing 1 pan in the bottom of the oven, bake it for 7 minutes, rotate and move it to the upper rack and add another tray to the bottom. Repeat in an assembly line fashion. After taking out of the oven, move to cooling rack. You may leave as is or brush with melted butter for added gloss and flavor. Let cool for 20 to 30 minutes to let the crumb set before serving.

For kolaches

DISCLAIMER - I haven't verified this procedure so it is kinda from memory of the workshop. I will update this post after I have verified it.

Before starting, prepare three or four 1/2 sheet pans with parchment paper. Also prepare any fillings or other toppings for the kolaches. Canned pie filling works pretty well. Turn out the dough on a heavily floured surface. Using a dinner spoon, portion out a piece of dough about the size of large walnut shell. Dust liberally with flour and then roll into a ball by taking your left hand and holding it very flat (even to the point of flexing it back so the surface is convex). Place the dough in the center of your left palm and then cup your right hand over your left and move in a circular motion, placing the lightest of pressure on the dough. It will take a little trial and error but you should find that after about six counter-clockwise circular motions, you will get a very uniform ball. If one is left handed, reverse positions and directions.

Stage each ball on the sheet pans with about 1 1/2" space to the sides and 3" between each ball. Once a pan is full, use fingers to flatten each ball to about 1/2" thickness. Let proof for about 30 minutes in a warm place until the dough rises approximately 1 1/2 times. After the 1st proof, using fingers degas the center of each ball so there is about 1/4" edge and the center is 1/8" thick. They should look like little thick crust pizzas. Let proof for another 15 to 20 minutes so the edges come back to shape.

While proofing the last time, preheat the oven to 425 degrees Fahrenheit. After proofing, degas the centers again and then fill with the prepared toppings. Place one pan in the bottom rack of the oven for 6 minutes. Rotate 180 degrees and move to the upper rack and add another pan to the bottom rack; bake for another 6 minutes. Repeat in an assembly line fashion. After taking out of the oven, move to cooling rack. Brush edges with melted butter. Let cool for 20 to 30 minutes to let the filling and the crumb set up before serving.

Update - Feb. 1, 2009

If the egg yokes are a little small, you might want to add a 5th. The last batch I did, the dough was a little to stiff so I added another yoke.

Updated - Aug. 24, 2009

Just a link to the pictures to form the kolaches.

2/04/2009

Bread Site

Found this site with some cool tutorials... Just wanted to keep track of it...

1/19/2009

UW-Platteville Carrot Cake Recreated...


My wife and I are both alumni of UW-Platteville. The university run food service there makes a carrot cake that is, to say the least decadent. My wife has dreams about this cake. Well, recently I was cleaning out one of the last boxes from moving and stumbled upon the recipe. You see, the food service was good about giving out the recipes and would even calculate out the amounts for making a "normal" batch. So, for my wife's birthday, I decided to try and recreate it with my own little tweeks.

The changes I made to the recipe have more to do with the method. In Alton Brown's book about baking "I'm Just Here for More Food", he makes the observation that carrot cake is not cake but a form of muffin. Thus, I applied Alton's "muffin method" to the recipe. I also added yellow rasins, because carrot cake needs some type of rasin. Because my wife loves the icing, I also split each layer so there would be four layers to allow for more icing delivery.

Mark's 4 layer UW-P Carrot Cake

Dry Works

2 2/3 cups all purpose flour
1 3/4 tsp baking soda
1 3/4 tsp baking powder
2 1/2 tsp cinnamon

Wet Works

1 1/4 cups canola oil
5 eggs
1 3/4 cups + 2 tbs granulated sugar

Additions

2 1/2 cups carrots (freshly grated)
1 cup crushed pineapple with juice
1/2 cup pecan nut pieces
1/2 cup yellow raisins

Before starting, preheat oven to 350 degrees F. Prepare two 9" round or 8" square cake pans by lining the bottom with parchment paper and coat with oil and flour (or Pam for Baking).

In a mixing bowl, combine the dry works. In a second, larger bowl, combine the wet works and whisk until well mixed. Add the carrots and crushed pineapple to the wet works and mix well with spatual. Add the pecans, yellow raisins and dry works and mix with spatual just enough to bring everything together. Divide the batter between the two pans and even out the tops with a spatual.

Place in oven and bake for approximatly 45 minutes. After 25 minutes, rotate the pans in the oven so the cake bakes evenly. Cake is done when toothpick comes out clean. Cool in pan for 20 minutes to allow the cake to set up. Using a thin knife, loosen the cake from the sides of the pans and then turn out onto cooling racks to prevent condensation from building up. Cover with a kitchen towel and let cool until cake comes to room temperature. Cover with cling wrap and refrigerate for at least 4 hours before icing.

Icing

16 oz cream cheese at room temperature
1 cup butter at room temperature
1 tsp vanilla
6 cup powdered sugar

In a stand mixer, beat together cream cheese, butter and vanilla. Once combined, set the speed of the mixer to low and begin adding powdered sugar 1/2 cup at a time. Scrape down the sides of the bowl as needed. Once the sugar has been added, scrape down the sides of the bowl one last time to ensure the icing is well mixed.

Remove cake layers from refrigerator and using a thin serrated knife, split each layer by cutting in from the edge and slowly rotating the cake. The effect is a bit like spiraling into the center of the layer from the side. A cake makers knife would be ideal for this process but one of the blades from a electric carving knife also works (and is not a unitasker). When you are done, use a cookie sheet to remove the top half of the cake layer. Do this by gently sliding the cookie sheet into the knife cut and pushing the top half onto the cookie sheet. Repeat the process with the other cake layer. When done, you should end up with 4 cake layers about about 1" thick.

Begin icing by placing one layer, cut side down onto a plate or aluminum foil covered piece of cardboard. Spread some of the icing on the layer. Place another layer of cake, again cut side down, on top of the first. Repeat with icing and then another layer and so on. Once the layers are stacked, ice the outside of the cake with the remaining frosting.

Cake serves approximately 20 people without causing diabetic shock. Leftover cake can be frozen by cutting into 2 serving pieces and wrapping them in wax paper, aluminum foil and then a freezer bag. May be stored for up to 3 months.

1/11/2009

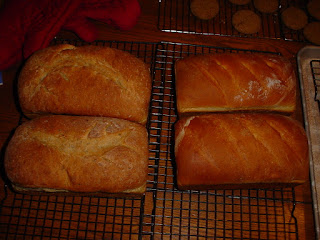
This weekends bread


This weekend, I got back into the bread making grove with some Cranberry-Pecan Cinnamon bread and another attempt at Pain de Mie. Both turned out much better now that I am back to using the King Arthur flour. Tried using the bread flour from Sam's Club but the cost savings was not worth the hassle.

I also attempted what I will call "Borkovetz Rye". This is an attempt to recreate the rye bread my great grandmother and grandmother use to make. I could never get the original recipe to turn out. Firstly it called for cake yeast which is hard to find and most of the measurements were approximate and thus dependent on that secret knowledge of my ancestors.

So, I started with Peter Rheinhart's rye recipe and tweeked it a little by adding the flavor combinations that the original recipe had. As a first attempt, it turned out pretty well. The flavor and texture is about where it should be. I made it with yogurt like the other rye I make but I think next time I will try it with butter milk. I think that will give it the right "sour" taste that is missing from this try. I will post the recipe when I get it finalized.

Now if only I had some liverwurst for on the rye bread...the evening would be complete.

1/04/2009

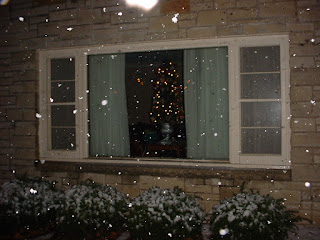
Christmas Tree

Well, the holidays are over. Thought I would post some pictures of the tree Lou did this year. It was inspired by our trip to Prague.


Project complete...


This weekend I put the finishing touches on the workbench I have been building. The tops have a 1/4" tempered hardboard top that can be easily replaced. I also got a 7" wood vice from Woodcraft and mounted that. In general I am pretty happy with the design. It has lots of storage and the built in electrical is working out well. Now on to the list of furniture projects...

12/31/2008

Kitchen Gadget Recommendation

This past year, our rice cooker died. After researching options and brands for about 3 months (yeah I know but there was a decision matrix involved), Lou and I finally settled on a Sanyo ECJ-HC100S rice and slow cooker. Did seriously consider the Zojirushi cookers but they were all a little more expensive and didn't have the slow cooker feature.

Have to say, it is the coolest rice robot. Throw rice in it with the water, pick the rice type on the little control panel and let the fuzzy logic do its thing. It is a little slow. Take a good 45 minutes to do 5 cups of brown rice but it hasn't been a problem so far. Thou I haven't used it, it does have a delay cook option so you could set it up before going to work and it would be ready when you got back. The hold temp option works really well also. Since the cooker is kinda pressure sealed, keeps the rice nice and moist for hours after cooking.

Today, I finally got around to using it as a slow cooker. I made a double patch of Alton Brown's tapioca pudding in it. Worked great. Threw in the tapioca with the milk for 2 hrs on high. When done, it kept it warm until I came around and finished it off. In theory the rice robot also works as a vegetable steamer and will even make tofu if you are hard core.

So, if you are looking for a rice cooker that is also a multi-tasker, get this one. It does come in 5 1/2 cup model as well but the 10 cup does just fine making 2-3 cups of rice, so I would recommend the bigger one unless you are looking for something for that small apartment in Tokyo.